
Imagine that you have decided to outsource a part of your business to an expert. You are willing to invest some serious cash to make sure you are getting the results that you want. You do your research and find the best person for the job.
You’re confident in this expert’s ability to do the work based on your conversations to this point, and you are ready to seal the deal and go for it. You communicate that you are ready to move forward and check this off your mental to-do list because your new expert will take care of the rest.
However, when you hear back from the expert, they are excited to work with you, but they do not actively lead you to the next steps. They may leave the “getting started” steps up to you or they drop the ball and you have to nudge them to find out how to proceed. Either way, there is no clear path or timeline for what to do next.
Sadly, this is not just an occasional problem in the B2B world. Many experts in their field do not have a client onboarding process to move their leads into clients. Larger companies may not have a smooth handoff from the sales to the fulfillment team. Smaller companies or solopreneurs may not have a written or templated system spelled out to make the transition easy for their clients.
Why have a documented client onboarding process?
When you create an onboarding process, you are providing a win for both yourself and your client. There are benefits to both, but I believe the benefits to you have a more profound effect on you than on your client.
Benefits to the client
Consistency: A written process ensures that every client goes through the same steps, reducing the chances of missed details or inconsistencies in service delivery.
Professionalism: A structured onboarding process reflects professionalism and competence, which can instill confidence in your clients and lead to positive first impressions, repeat business, and referrals.
Clarity: Clients will have a clear understanding of what to expect, reducing misunderstandings and potential disputes.
Benefits to your business
Efficiency: A documented process streamlines operations by outlining the exact tasks and procedures, making it easier for you and your team to follow and complete tasks efficiently.
Time-Saving: With a defined process, you can save time by automating certain steps or using templates, allowing you to focus on delivering quality service.
Scalability: As your business grows, having a standardized onboarding process makes it easier to bring new clients on board without chaos.
Feedback and Improvement: A documented process allows for continuous improvement. You can identify bottlenecks and areas for enhancement based on client feedback and performance metrics.
Training: A standard process aids in training new team members, making it simpler to get them up to speed quickly.
Client Satisfaction: A smooth onboarding experience enhances client satisfaction and increases the likelihood of repeat business and referrals.
Many of these benefits overlap, but it is clear that a documented process for onboarding your clients is an essential way to ensure an excellent client experience and an efficient flow of operations internally.
So how do I create a client onboarding process?
The specifics of your client onboarding process should be tailored to your business and the unique needs of your incoming clients. However, there are some common steps that should be included in every onboarding process.
Once you have documented the steps, it’s a great idea to add them to your project management system as a template. As soon as you win the deal you are ready to replicate the steps to ensure nothing is missed.
Phase 1: Client Prep
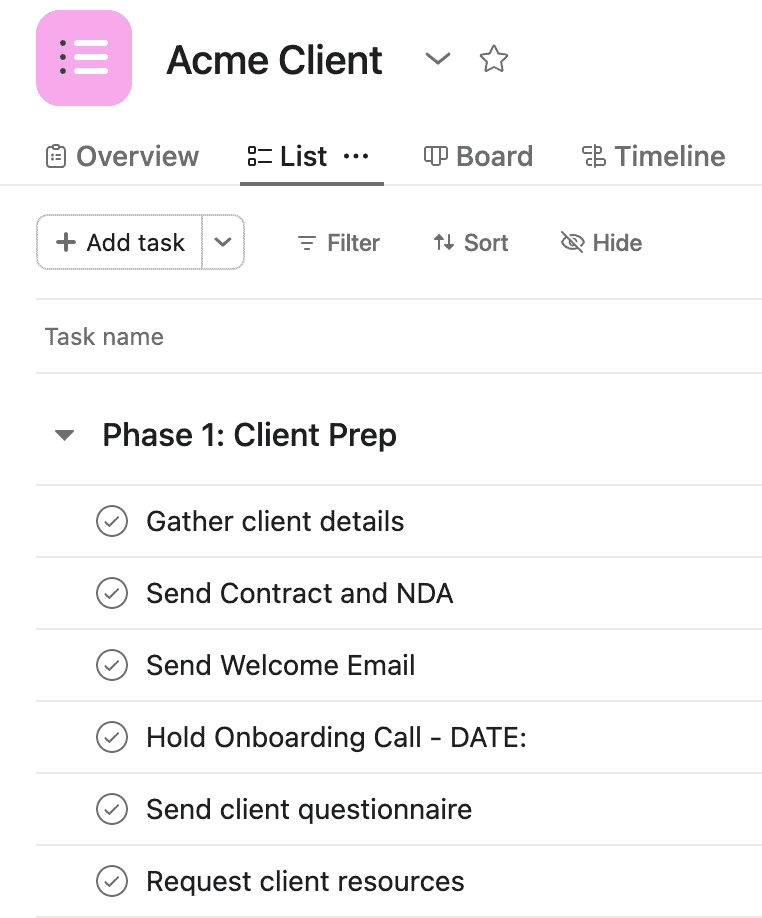
Gather Client Details
Having all the client’s details in one place becomes the foundation for seamless onboarding. If you are already using a Customer Relationship Management (CRM) tool, these details are likely already documented. However, there are some details that you will want to highlight such as the tech stack they are currently using, their preferred meeting days, etc.
Send Contract, NDA
The first point of contact after the deal has been closed should be the client contract or agreement. You may also want to include a mutual NDA, depending on the nature of your work. During this step, the invoice can be sent, as well.
Send Welcome Email
A welcome email will show your clients that you have a clear process in place for the engagement. It can be simple and short, sharing a timeline for the next steps, a scheduling link, and your excitement for working with them. Depending on the scope of the engagement, you may be able to remove the onboarding call and share the details from a call in this email. You may also be able to add the questionnaire step to this email as well.
Hold Onboarding Call
If you are serving the client in a larger project, plan a dedicated onboarding call with the client and other stakeholders. This call serves to build relationships, confirm deliverables, and get the project kicked off well overall.
Send Client Questionnaire
A written questionnaire may be necessary for several reasons. But two of the most important reasons for using a written questionnaire are to confirm your understanding of the client’s needs, thereby personalizing the service that you deliver to them. And this written documentation ensures that the client’s expectations are stated upfront and can be referenced throughout the time you are working together.
Request Resources from Client: Streamlining the Process
A final step in the initial phase of onboarding a new client is requesting resources and access from your client. This can be done simply through a templated email or a form that maps to your work management platform. When you ask for these things at the beginning of the process, it streamlines the work moving forward and prevents bottlenecks while waiting for a response from a busy client.
Phase 2: Planning and Kickoff
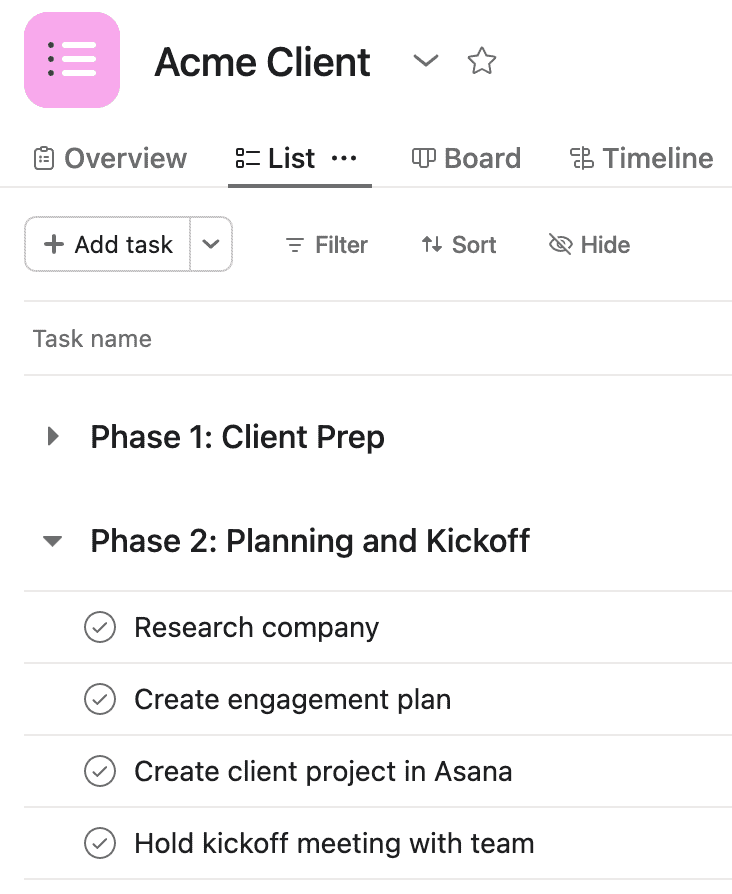
Research
When you begin working with a new client, learn as much as possible about the client and their needs. This information will be a key to providing tailored solutions that will serve your client best.
Create Plan
No matter the deliverable, it’s important to have some predefined strategies for success. You will already have a general plan for the services you offer, but this step ensures you are customizing that plan for your client and that the desired results are crystal clear.
Create a Project in Your Project Management Tool
Once the plan is in place, add specific tasks inside your Asana project for this service. Be sure to create a project template in Asana for each type of service you offer that can be easily replicated here.
During your kickoff meeting, assign specific work to individuals and teams and map out the project timeline in the Gantt chart in Asana. Each team member will track their work right in the Asana project and will communicate about the work there as well.
Use the project status tool in Asana to add weekly updates for the team so that the progress is clear for your team. This weekly update will also be helpful with your ongoing communication with your client.
Hold Kickoff Meeting with Internal Team
If you are collaborating with others on the offering to your client, hold a meeting to make sure every team member understands the deliverables and the projected timeline. Ensuring a unified start will help the project stay on track. Depending on the size of the project, this may be a simple 15-minute meeting or it may take up a couple of hours on your calendar.
Ongoing: Client Communication
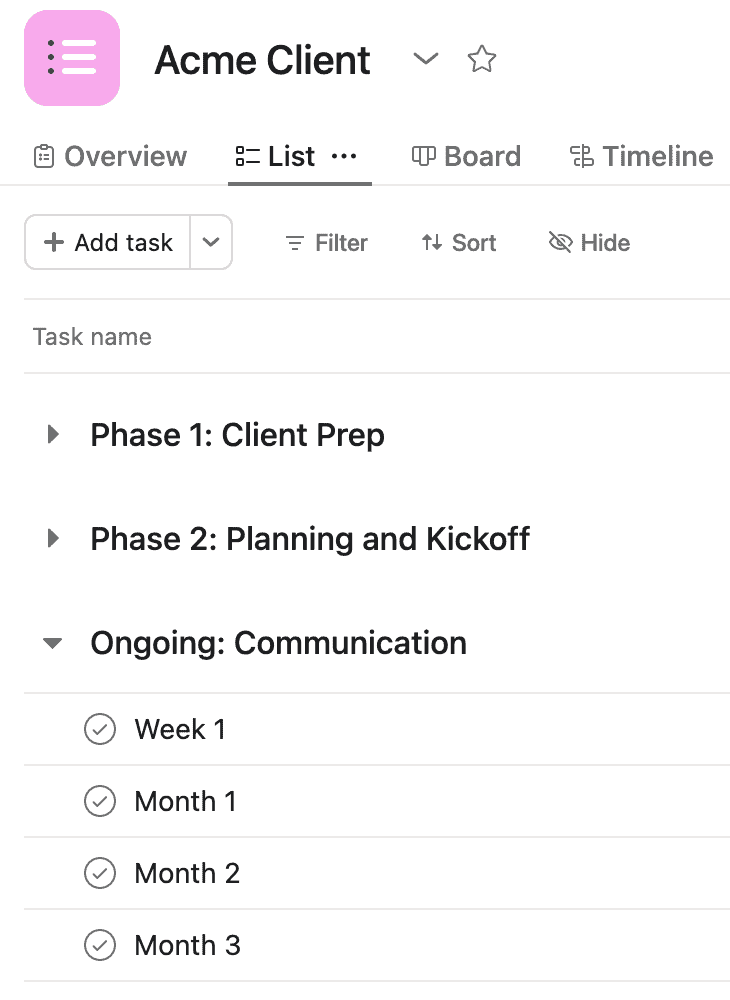
Week 1
During the first week of the engagement, set the expectations and milestones for the project. Your client will be happier with your work if these are clear from the beginning.
Set future call dates on your calendar and send calendar invitations now, if possible. Update the client when the project has officially begun and at the end of the first week. Err on the side of overcommunicating at this point.
End of Month 1, 2, 3, etc.
The cadence for communication will depend on the type of service you are offering, but for a larger project, you will want to share progress updates at least each month.
You can quickly get a snapshot of how the work is progressing from the communication you see in your Asana project. If you are unsure where parts of the work stand, simply ask the assignee of those tasks in Asana for details to help you communicate with the client.
During each client communication, seek feedback and clarification as you share updates. Make adjustments to the project and communicate those changes to your full team in an Asana message to project members.
Communicating at regular intervals will build confidence in your work and will ensure long-term satisfaction with your services. Never underestimate the importance of continuing to build the relationship through excellent communication.
Phase 3: Wrapping Up
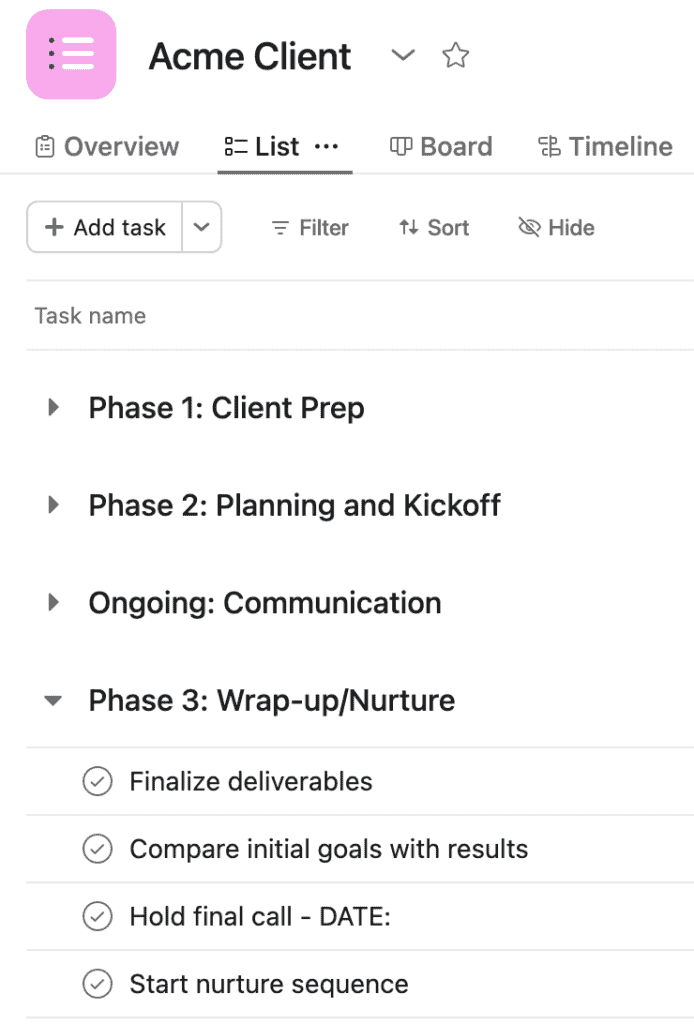
Finalize written deliverables
When the project is coming to a close, finalize any written deliverables, packaging them in an easy-to-understand format customized to your client’s needs. Hold a wrap-up call with your internal team to get full clarity on the culmination of the project, if necessary.
Compare initial goals with results
Confirm that the client’s goals for the project match up with the results you will deliver to them. If something is lacking, go back to the project plan and check for unfinished deliverables.
Hold final call
It’s time to share your work with your client! Use this call to delight your client by going above and beyond in your service and deliverables. Ask for feedback on the client experience and the final service outcome. Follow up with a written feedback or case study request, if appropriate.
Above and Beyond
Delight your client by going above and beyond after you have ended the active engagement. Add them to a nurture email sequence that provides ongoing expertise related to their purchased service. Send a handwritten thank you note or a simple thank you gift for allowing you to work with them.
Conclusion
Every business needs a written client onboarding process. The complexity of the process will differ for each business, but there are key steps in this process that are necessary for every business.
The steps listed in this basic onboarding and delivery process are a starting place for you to use to design your own system. If you don’t have time to create this process in your business, no worries. Contact us at TesseraVBS.com and we will be happy to help.
This is blog #2 in a series called Top Business Processes Defined. Be sure to check out
Turning Ideas Into Offers: An SOP for Every Coach and Consultant
You might also learn from:
What’s It Worth? The Value of Documenting Business Processes
Why Every Company Needs Standard Operating Procedures
The Simple Process of Creating an SOP
Check out the “Learn” tab at TesseraVBS.com


About the Author
Paula Holsberry is the founder of Tessera Virtual Business Solutions, specializing in optimizing work processes for remote teams. With experience in both start-ups and larger companies, she helps teams maximize productivity through efficient Asana training and consulting.
